


Many situations need booting to the BIOS, such as when you initially constructed your PC, when you want to modify certain settings, or when you need to address a problem.
That’s why it’s aggravating when your computer won’t let you access BIOS or, worse, the operating system.
Learn why your PC won’t boot to BIOS or Operating System and how to repair the problem by further reading.
PC Not Booting How To Fix?
1. Troubleshoot a Faulty Power Connector

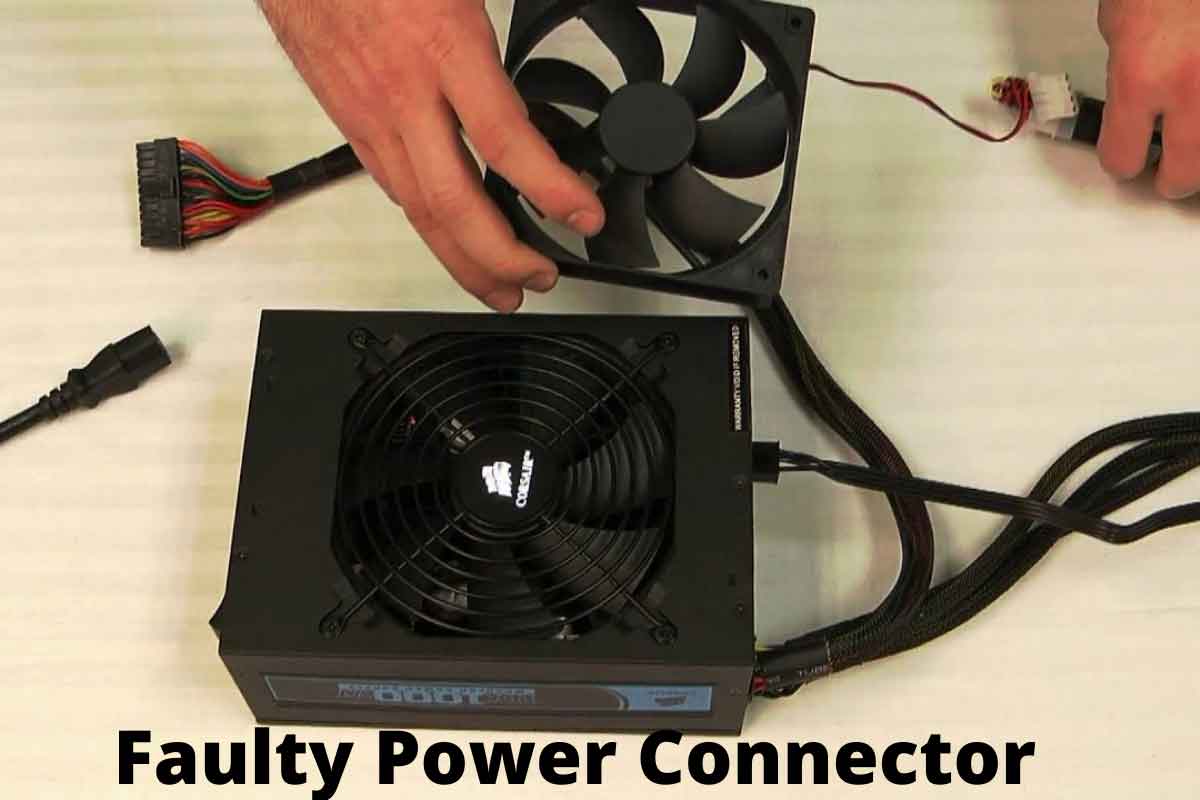
You won’t be able to boot to BIOS if the motherboard or CPU’s power connector is plugged in incorrectly or is defective.
Make that the 24-pin connection on the motherboard is plugged in firmly and that there is no evidence of damage on the cable itself.
The CPU normally has a 4+4 connection with eight pins.
Make sure both ends are properly connected.
Make that the other ends of the cords that go into the PSU are connected properly.
2. RAM Sticks Troubleshooting
When your computer boots to BIOS or OS, a RAM problem might cause it to fail.
You must ensure that all of the RAM sticks are in good working order and are properly positioned.
Turn off the computer by unplugging the power cord.
Locate the RAM sticks on the motherboard by opening the case.
Remove them all from their positions and replace them one at a time.
You should line up the notch in the RAM with the notch in the slot when installing each RAM module.
The tabs on both sides should create a clicking sound if the stick is properly seated.
Make sure you don’t put the stick in backward.
Try restarting your computer.
If it still doesn’t work, remove all of the RAM sticks and replace only one of them.
If the system now boots, add the remaining RAM sticks one by one until you identify the problematic one that has to be replaced.
Remember that a motherboard slot might be destroyed, thus you’ll have to attempt other slots to obtain results.
3. UEFI Firmware Settings should be used.
If your computer’s operating system is Windows 10, accessing the BIOS using the UEFI firmware settings is the best option if the OS boots correctly but you don’t have access to the BIOS.
- Select the Update and Security option in the Settings app.
- Select the Recovery tab from the left pane, and then the Restart Now button beneath the Advanced Startup section.
- Click the Troubleshoot button in the new window with the heading “Choose an alternative.”
- After that, go to Advanced Options, then UEFI Firmware Settings.
- Now press the Restart button to return the machine to BIOS.
3. To Reset The CMOS, Remove The BIOS Battery.
Because CMOS battery problems might create boot problems, you should remove the battery and clean the CMOS.
The following is what you should do:
Turn off and disconnect any USB, HDMI, or other ports-connected peripherals from your PC.
Remove the power line from the computer and open the case.
On the motherboard, look for a flat coin-shaped battery, similar to a watch battery. If you can’t find it, look in the manual for your motherboard to see where it is. Now you must gently remove the battery from its location.
A clip or a lever may be used to keep it in place. Remove the barrier using your hands or a screwdriver, then remove the battery.
Allow the battery to lie outdoors for about 20 minutes before replacing it. Check to see if it’s correctly seated.
Close the case, reconnect all of the cables, and turn on the computer. The CMOS battery has a lifespan of roughly 10 years. It’s fair to presume that the battery is dead if you’ve had the motherboard for that long or if you’re using a second-hand motherboard. Replace the CMOS battery with a new one to resolve the problem.
What Is The Best Way To Boot A PC Into Windows?
Follow this troubleshooting step if you have successfully accessed the BIOS but are still having difficulties starting the Operating System.
Disconnect all external peripherals.
Because of a conflict with one of the peripheral devices you’ve attached or their drivers, the Windows operating system may have trouble starting.
Disconnect them all, restart your computer, and check if the OS loads.
Shut down the computer and disconnect all USB devices, such as the mouse and external hard drive.
The power cord, the monitor’s display wire, and a keyboard should be the only cables left attached to your PC.
To discharge any residual electricity, press the power button a few times.
Then switch the system on, and if Windows starts up, you’ve discovered the issue.
Connect each device one at a time and restart the computer until you identify the one that isn’t working.
2. Take a look at the BIOS Error Messages
When the system can’t complete the boot process, it usually displays an error message or emits a beep signal to assist you to figure out what’s wrong.
Read the problem message that appears on the screen or listen to the beeps when the computer is booting up and check up the meaning.
Specifics can be found in the handbook for your computer or motherboard, as well as on the manufacturer’s website.
Continue down the list to locate the problem if you don’t see or hear anything.
3. Resolve any issues with the boot device
There might be an issue with the storage disc where Windows is installed or the boot sequence if your PC boots to the BIOS but does not load the Operating System.
The boot order determines how the system prioritises and analyses different storage alternatives for Windows loading.
In the boot order, the drive containing the operating system should be first.
Here’s how to figure out what order your boots should be in:
Restart your computer after removing the flash drives and external storage.
During boot time, enter the BIOS as described in the preceding sections.
The Boot part of the BIOS related to storage may be found there. It may be called anything like Boot Order Menu or Boot Priority.
Place the primary drive, which contains the operating system, at the top of the list. Disable all except one of the discs and boot the system if you don’t know which one houses the OS. Continue to the bottom of the list until you find the right drive. Prioritize it before enabling the rest of the storage discs.
Remember to quit the BIOS and save your modifications.
It’s worth noting that the BIOS might not identify the OS disc at all, in which case it won’t appear in the list.
That suggests there’s a problem with the drive itself.
Confirm that the wires attached to the storage drive are correctly connected.
If your operating system is installed on an M.2 SSD disc, make sure it’s properly positioned.
If you’re worried about the drive being destroyed, you’ll need to test it on a different computer.
4. Make a BIOS update
When you’re having boot problems, updating the BIOS might assist, especially if you’re constructing your own PC or have an older motherboard installed.
When you have an old motherboard, a firmware upgrade might fix difficulties caused by newly linked gear.
The approach varies depending on the manufacturer, so consult the motherboard manual or the company’s dedicated website for details.
5. Switch to Windows Safe Mode.
Many boot troubles can be resolved by booting Windows in Safe Mode, which starts the system with the bare minimum of software and bypasses driver and software issues.
You may access Safe Mode by using Windows Recovery.
To force the machine to trigger Windows Recovery, interrupt the boot process three times in a row.
You should see a screen with the title “Choose an option.”
Select Troubleshoot from the Troubleshoot menu, then Advanced Options, then Startup Settings.
Now restart the computer in Safe Mode.
A Windows 10 recovery disc is another option to get into Safe Mode.
You’ll need to make a disc with the Windows 10 recovery environment on it.
You’ll need another computer running Windows 10 and an external USB drive with at least 512MB of capacity.
Open Control Panel on the other computer and choose Create a recovery disc.
Follow the on-screen prompts to save the data to the USB device.
Set the USB drives as bootable in the BIOS if you haven’t previously, as stated in the preceding steps.
Establish the drive as a top priority.
Safe Mode should be selected when the machine is restarted.
6. Default BIOS Settings Should Be Restored
When starting, several BIOS setups and settings might cause problems.
You might be able to get your machine to boot into Windows again if you disable them.
The first option is Fast Boot, which allows Windows to start up faster by preloading discs.
Some Windows upgrades might cause boot problems by generating issues with Fast Boot compatibility.
You’ll have to disable this option in BIOS.
Look for Fast Boot under Advanced Options or Boot Options once you’ve entered the BIOS.
If you can’t locate it there, check the documentation for your motherboard to see where it is on your individual computer model.
You’ll have to turn it off after you’ve reached it.
The Secure Boot setting is the second difficult option.
This function safeguards the system against infection by scanning the loaded hardware and discs while the computer boots up.
Secure Boot will terminate the booting process by producing an error if it doesn’t identify hardware or a driver.
It’s possible that turning this parameter off in BIOS will solve your problem.
It’s normally found in the Boot Options section.
Other improper BIOS settings may also create booting problems, and if you don’t know how to change them, restoring the BIOS to its default settings will solve the problem.
You’ll need to go into the BIOS and look for “Load Setup Defaults” or “Load Default Choices” options.
It might be anywhere on your machine, so search in the Configuration, Security, Restart, and Exit areas first.
The system will restore the BIOS to its default settings once you click the option and select Yes in the dialogue box.
7. Standoffs for Motherboards
In some systems, poor installation of the motherboard standoffs might create boot troubles, which may appear unexpected.
Check that all of the standoffs are in place and that the screw holes are aligned.
8. Conduct a Malware Scan
If your computer has been infected with malware or viruses, they may be blocking it from booting.
Use a bootable antivirus rescue DVD as your only alternative.
You’ll discover the greatest alternatives for a recovery disc here.
9. Use the System Restore feature.
You may use the System Restore function to restore Windows to an earlier point when everything was working regularly to resolve difficulties caused by a modification you made in your system.
To do a System Restore, follow these steps:
- As described in the preceding sections, go to the Windows Recovery Environment.
- Advanced Troubleshooting Options should be selected. Additional Recovering Options Configure your startup options.
- Select the Restart Now option.
- By hitting the 7 or F7 key, select Disable driver signature enforcement from the list of startup settings.
Wait for the procedure to complete.
10. Factory Reset
A Factory Reset, also known as a “Reset” or “Refresh” by Microsoft, is your final resort and the most damaging procedure available.
Some or all of your stored data and files will be lost.
Select Restart this PC once you’ve entered the Windows Recovery environment and navigated to the Troubleshoot sections.
What Is BIOS?
The BIOS, or Basic Input Output System, is a preinstalled ROM chip or firmware on the motherboard that contains the information needed to access and set up your system at its most basic level.
The BIOS serves as a bridge between the operating system and the hardware on which it operates.
It manages data flow between the operating system and peripherals like the hard disc, keyboard, mouse, printer, and so on.
The BIOS is used by the computer’s CPU to start the system once you turn it on.
A boot device is a piece of hardware that stores the files required for the computer to boot up.
The BIOS checks that all of the boot devices and essential accessories are working before booting the operating system (OS) or the major sections of it.
What Are BIOS Functions?
You should know the BIOS functions and what they do in order to diagnose and better comprehend the problem you’re having.
Before the BIOS launches the OS, the Power-On Self-Test analyses the computer hardware and ensures there are no faults. The system will not boot to BIOS or the operating system if it fails the POST test, indicating a problem with one of the components. You may hear a series of beep noises that represent codes regarding what is wrong.
Bootstrap Loader: The Bootstrap Loader searches for an operating system and, if one is found, passes control to it.
BIOS Drivers: These low-level drivers offer the PC’s hardware basic operating control.
Complementary Metal Oxide Semiconductor (CMOS): CMOS stands for Complementary Metal Oxide Semiconductor.
Users may alter system and hardware settings, such as time, date, and passwords, using the configuration software.
How To Correctly Enter BIOS
There is no “proper” way to access the BIOS setup because each computer and motherboard has its own method.
The procedure for accessing the BIOS on most freshly made computers is the same, and it requires a keyboard.
While the computer is booting up, tap one of the following keys on the keyboard:
F1 \sF2 \sF10 \sDel \sEsc
Because the details of your computer may be unique, visit your computer’s manual or the manufacturer’s official website to learn how to access the BIOS.
If you constructed your own PC, you’ll need to consult the motherboard’s handbook.
If you were unable to access the BIOS using the previously indicated approach, proceed to the following part to resolve the problem.
Contents